
Ever stood in your living room thinking, “This place could be in a magazine if I had an extra ₹10,000”? Yeah, me too. That crushing moment when you realize your champagne taste is wrestling with your tap water budget.
But here’s the thing – creating a luxurious home doesn’t always require emptying your savings account. The secret lies in strategic budget-friendly design hacks that deliver maximum visual impact.
I’ve spent years perfecting affordable interior design tricks that make homes look expensive without the price tag. These ten budget-friendly design hacks will transform your space from “just fine” to “wow, who’s your decorator?”
The best part? You won’t need to explain to your partner why you maxed out another credit card. But I should warn you about hack #3 – once you try it, you’ll never look at thrift store finds the same way again.
Maximizing Impact with Paint and Color
Strategic accent walls that transform rooms
Ever walked into a room and instantly felt that “wow” factor? Yeah, that’s what an accent wall does.
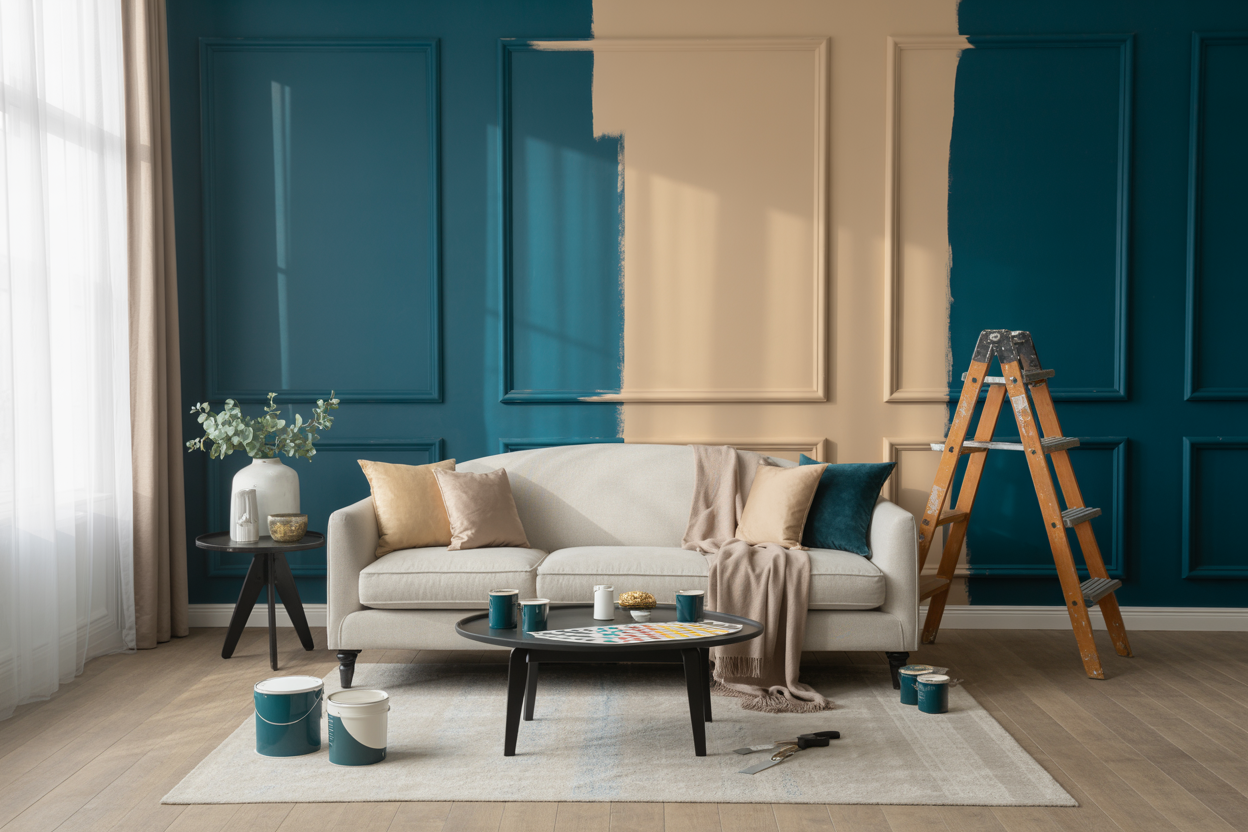
Paint is the ultimate budget hack in the design world. For under ₹500, you can completely transform a space that would otherwise cost thousands. The trick? Don’t paint every wall. Choose one strategic wall – typically the one you see first when entering or the wall behind a key piece of furniture.
Dark, rich colors like navy, emerald, or charcoal create instant drama. They make your existing furniture pop and add unexpected depth to small spaces. Sounds counterintuitive, but that dark wall actually makes your room feel bigger, not smaller.
Got a boring bedroom? Paint the wall behind your headboard. Bland living room? Transform the TV wall. Uninspired home office? Paint the wall you face while working. Boom – instant character.
Color psychology for luxury feel on a budget
The wealthy know something you don’t: certain colors just feel expensive.
Neutrals aren’t boring – they’re sophisticated. Think warm taupes, soft greiges, and creamy whites. These colors create a canvas that makes everything else look more expensive.
But here’s the insider secret: it’s all about the undertones. Cheap-looking beiges have orange undertones. Luxury beiges? They lean slightly green or gray.
Want the cheat code? These colors scream money:
- Benjamin Moore “Revere Pewter”
- Farrow & Ball “Elephant’s Breath”
- Sherwin Williams “Agreeable Gray”
Pair these with one bold accent color – emerald green, navy, or even black – for that high-end look.
DIY paint techniques that mimic expensive finishes
Why pay for fancy wallpaper or specialty finishes when paint can do the trick?
The limewash technique gives you that textured, European villa look for a fraction of the cost. All you need is specialized lime-based paint (about ₹400) and a brush. The technique is forgiving – just slap it on unevenly and let the magic happen.
Color washing creates subtle dimension on walls. Apply a base coat, then lightly brush over with a watered-down second color. It mimics expensive plaster finishes for pennies.
For the ultimate luxury hack, try this marble technique: base coat in white, then use a feather to lightly drag gray paint in random veining patterns. Sounds crazy, looks amazing.
These techniques work because they add texture and dimension – the exact things flat, builder-grade walls lack. And unlike real marble or specialty plasters, you can do it yourself this weekend.
Thrift Store Treasures and Upcycling
Spotting Quality Pieces with Potential
Want to know a secret? The best luxury homes often feature one-of-a-kind pieces you won’t find in catalogs. The trick is training your eye to spot diamonds in the rough.
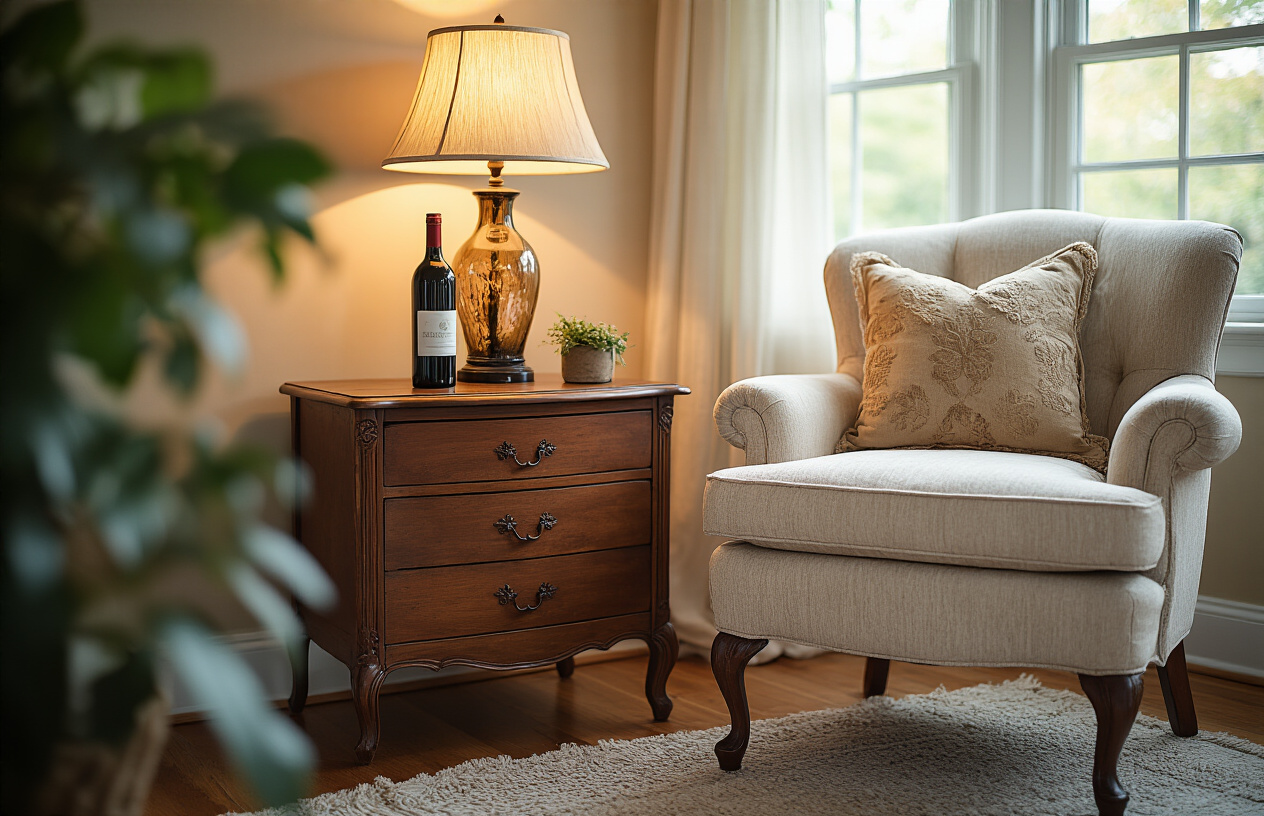
When thrifting, ignore the dust and weird smells. Focus on construction. Flip that chair upside down. Solid wood with dovetail joints? Grab it! Heavy, sturdy pieces with good bones are worth their weight in gold.
Look for classic shapes and proportions—they never go out of style. That ugly lamp with perfect proportions? The hideous fabric on that well-structured chair? Those are easy fixes.
Simple Refinishing Techniques for Furniture
You don’t need a workshop full of fancy tools to transform thrift finds. I’ve turned ₹200 side tables into pieces that look straight out of designer showrooms with just:
- Fine sandpaper and a clean cloth
- Chalk paint (no priming needed!)
- New hardware (seriously, just swap those knobs)
- A can of spray paint for metal pieces
Dark, dated wood furniture? Sand lightly and try a whitewash technique—one part white paint, two parts water. Brush on, wipe off. Instant coastal chic.
Transforming Vintage Finds into Statement Pieces
The difference between “old junk” and “curated vintage” is all in the presentation.
That brass candlestick collection looks museum-worthy when grouped on a mantel. Those mismatched china plates? Hang them in a pattern on the wall for instant art.
Create conversation pieces by giving vintage items unexpected roles:
- Old ladders as blanket storage
- Suitcases stacked as nightstands
- Vintage tins as planter holders
Creative Repurposing of Everyday Items
The most luxurious-looking homes have personality, not cookie-cutter decor.
Turn wine crates into wall shelving. Use vintage scarves as throw pillow covers. Hang a collection of mirrors from different eras for a look that’s both eclectic and elegant.
Old books? Stack them by color under lamps to create height variation. That wooden toolbox? Perfect bathroom organizer for rolled towels.
The beauty of repurposing is the story. When guests ask about that amazing coffee table (that’s actually an old trunk), you’ll have something interesting to share beyond “I bought it at Target.”
Lighting Transformations
Strategic placement for maximum ambiance
Ever walked into a room that just felt right, but you couldn’t figure out why? Nine times out of ten, it’s the lighting. Most folks think good lighting means buying expensive fixtures, but honestly? It’s all about placement.
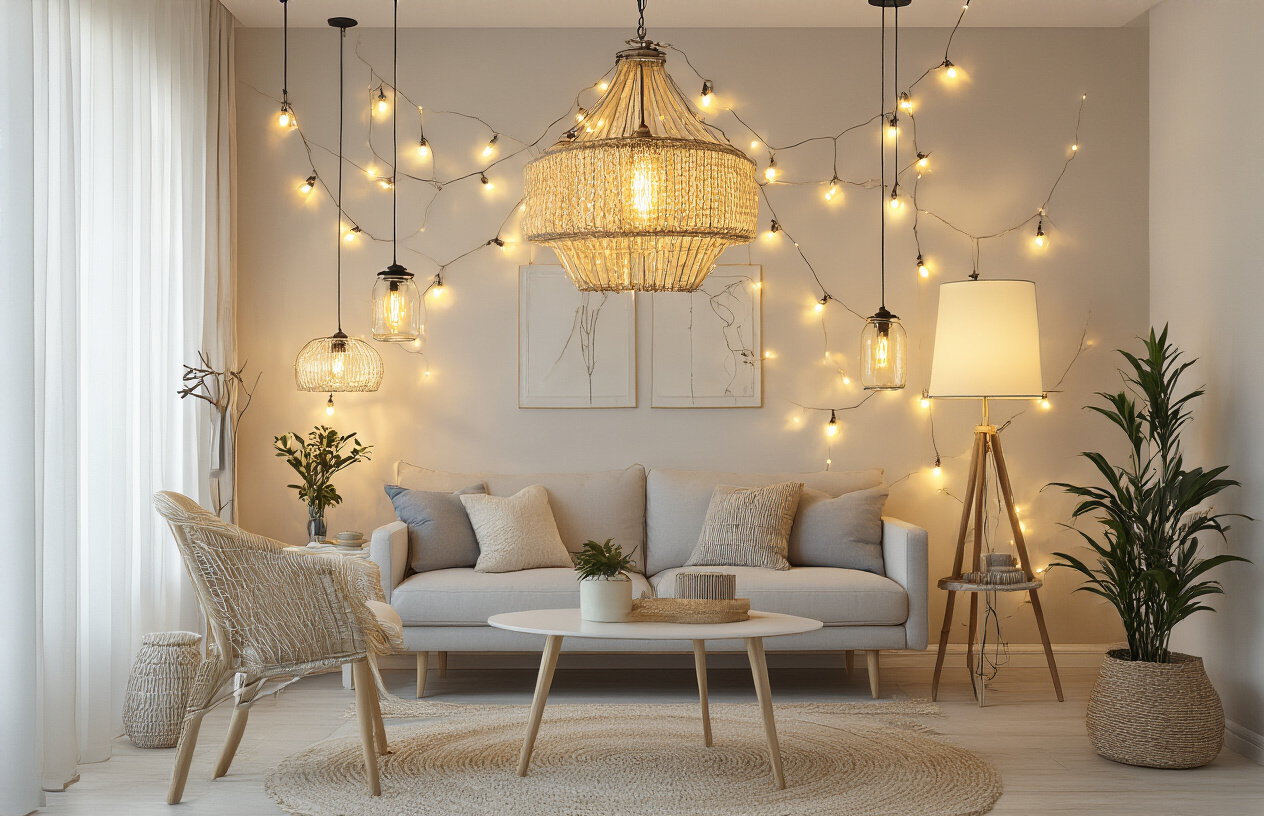
Try this trick: use three light sources in any room. Low, mid, and high. A floor lamp tucked behind a chair, a table lamp on your side table, and maybe some string lights draped over your bookshelf. Boom – instant cozy factor for under $50.
The corners of your room? Total lighting goldmines. Placing uplights in corners bounces soft illumination off two walls at once. That’s designer-level ambient lighting without the designer price tag.
DIY designer-inspired light fixtures
Those gorgeous pendant lights you’ve been eyeing at West Elm? You can make something just as stunning for a fraction of the cost.
Got an old brass lamp collecting dust? Remove the electrical components, spray paint it matte black, and add a modern shade. Nobody will know it cost you $15 total.
My favorite weekend project? The woven pendant:
- One large wicker basket: $8 at the thrift store
- Light kit: $12 at the hardware store
- One hour of your time
Cut out the bottom of the basket, thread the cord through, and hang. Your friends will think you spent hundreds.
Upgrading existing fixtures on a budget
Those builder-grade flush mounts aren’t doing your home any favors. But you don’t need to replace them entirely.
Drum shades slip right over existing ceiling fixtures and instantly transform them from boring to boutique. They cost about $30 online compared to $200+ for a new fixture.
Cabinet hardware makes for surprising light fixture upgrades too. Take those glass boob lights everyone hates and remove the glass dome. Add a metal cage made from decorative hardware store finds, and you’ve got an industrial-chic fixture that looks like it came straight from Restoration Hardware.
The secret weapon? Dimmer switches. For under $20, they transform even the most basic lighting into something with serious mood-setting potential. Install one this weekend and watch how your existing lights suddenly feel intentional and luxe.
Textile Tricks for Instant Luxury

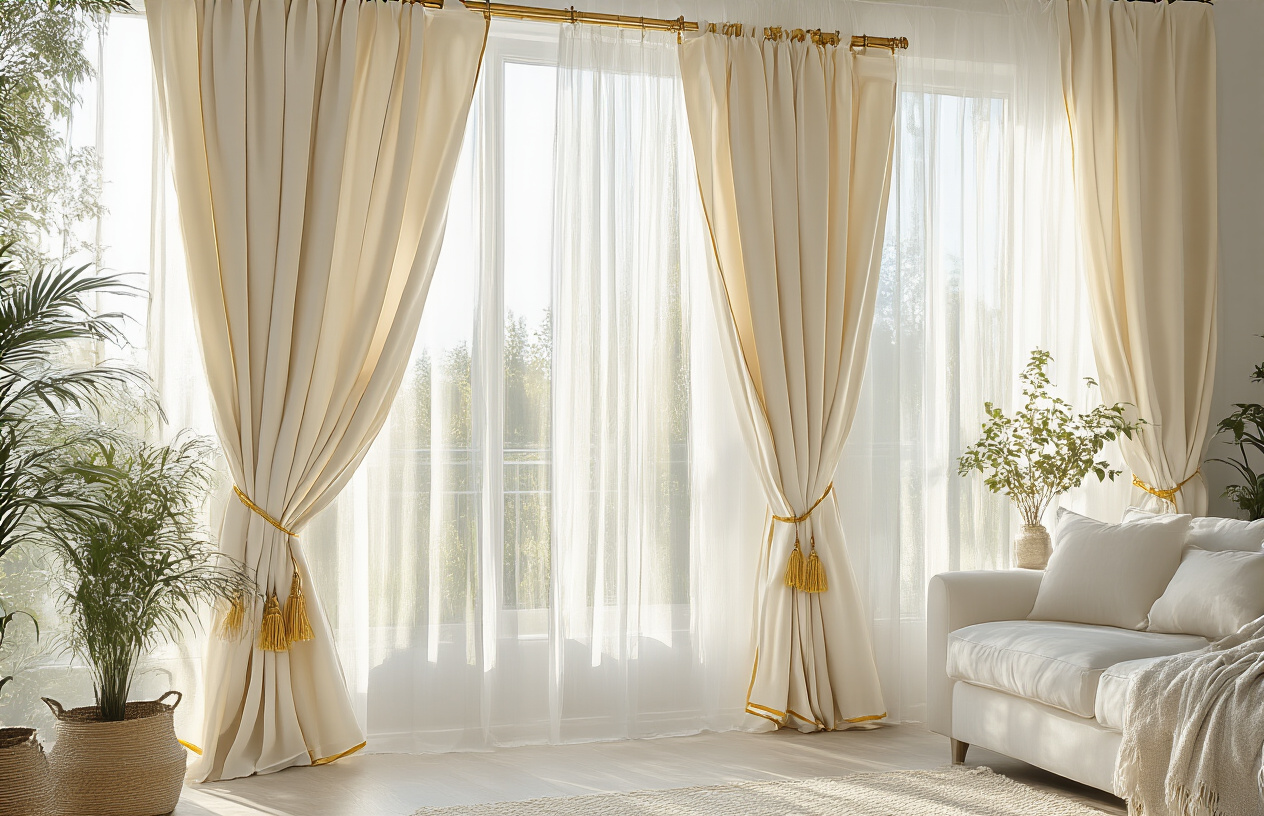
Strategic use of curtains to enhance room dimensions
Want a quick way to make any room feel taller, wider, or just plain fancier? It’s all about how you hang your curtains.
Mounting curtain rods close to the ceiling instead of right above the window frame instantly creates the illusion of height. And here’s the thing – this trick costs you absolutely nothing extra if you’re buying curtains anyway.
For narrow rooms, extend your curtain rod 10-12 inches beyond the window frame on each side. When the curtains are open, they’ll stack outside the window, making the window (and room) appear wider while letting in maximum light.
As for the curtains themselves? Skip the expensive custom options and try:
- IKEA’s RITVA curtains (around $35/pair) which hang like much pricier options
- Bed sheets from discount stores (yes, really!) repurposed as curtain panels
- Dropcloth curtains for that casual linen look at a fraction of the cost
Budget-friendly pillow and throw combinations
The fastest textile transformation comes from pillows and throws. You don’t need to spend a fortune to nail this designer trick.
Instead of buying overpriced decorator pillows, hunt for these alternatives:
- Pillow covers only (much cheaper than full pillows)
- Clearance fabric cut and sewn into simple square covers
- Repurposed vintage scarves as instant pillow wraps
The secret to a high-end look is mixing textures rather than matching everything. Try this formula:
- One solid velvet pillow
- One textured neutral (bouclé, waffle weave, etc.)
- One simple pattern or statement piece
- A casually draped throw in a complementary texture
Thrift stores often have 100% wool or cashmere throws for less than synthetic versions at big box stores. Always check fiber content, not just price tags!
DIY upholstery refreshes
That dated sofa or tired dining chairs don’t need a full reupholstery job (which can cost thousands).
For dining chairs, you only need:
- Staple gun
- Fabric (1/2 yard per chair seat)
- Screwdriver to remove seats
- 30 minutes of your time
The entire refresh costs less than one new chair would.
For sofas, try:
- Fitted slipcovers (much improved from the baggy versions of the past)
- Strategic throws and pillows to hide worn areas
- Fabric dye for faded but structurally sound pieces
One client’s brown microfiber sectional went from dated to designer with a charcoal gray dye job and new pillow arrangement – total cost under $75.
Affordable rug solutions and layering techniques
Rugs are typically budget-busters, but these tricks deliver luxe looks for less:
Layering transforms affordable options into custom-looking statements. Start with:
- A large natural fiber rug (jute/sisal) as the base layer
- A smaller, more colorful or patterned rug on top
This approach costs 50-70% less than a single large designer rug would.
Other smart options include:
- Carpet remnants bound into custom rugs (often 70-80% off retail)
- Indoor/outdoor rugs for high-traffic areas (more durable and washable)
- Vintage rugs from online marketplaces (unique patina that expensive new rugs try to replicate)
The layering technique also lets you use smaller, more affordable rugs to cover more ground. It’s the textile equivalent of having your cake and eating it too.
Mirror and Art Placement Strategies
Creating gallery walls without breaking the bank
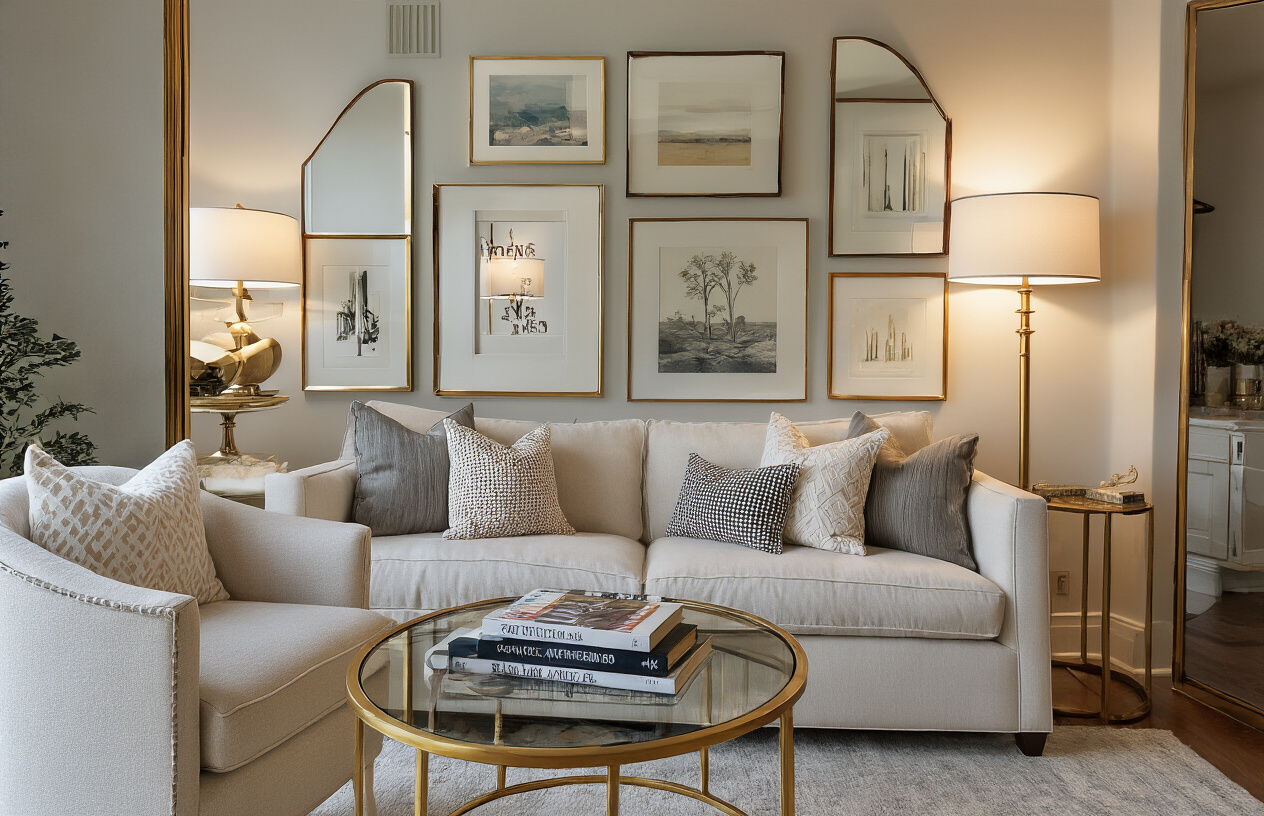
Who says you need to spend a fortune on artwork? Gallery walls make a statement, and the secret is in the arrangement, not the price tag.
Hit up thrift stores, estate sales, and even Facebook Marketplace. You’d be amazed what people give away. I scored vintage botanical prints for $2 each that look straight out of a design magazine.
Free printables are your best friends too. Websites like Unsplash offer stunning photography you can download and print at home or at a copy shop for pocket change.
The frames? Mix and match! Spray paint mismatched frames in gold or matte black for an instant cohesive look. Even dollar store frames look expensive with a quick coat of paint.
Using mirrors to enhance space and light
Mirrors are magic in small spaces. They bounce light around and visually double your room size without costing what an actual renovation would.
The trick is placement. Position mirrors across from windows to maximize natural light reflection. A large mirror propped against a wall costs way less than hanging artwork of the same size but makes twice the impact.
Check out Facebook Marketplace and Craigslist for mirrors people just want gone from their homes. Often they’re practically giving them away because they’re heavy to move.
DIY art projects that look expensive
Canvas too pricey? Use thick watercolor paper instead and float it in frames for that gallery look.
Try this foolproof abstract art technique: Use painter’s tape to create geometric shapes on canvas, then paint over with 2-3 coordinating colors. Remove the tape when dry for crisp lines that look professional.
Another winner? Large-scale botanical pressings. Frame pressed leaves and flowers between glass frames for botanical art that rivals expensive prints.
Gold leaf makes everything look luxe. Apply it to the edges of canvas or even to simple geometric shapes on paper for art that looks like you paid hundreds.
Bathroom and Kitchen Upgrades Without Renovation
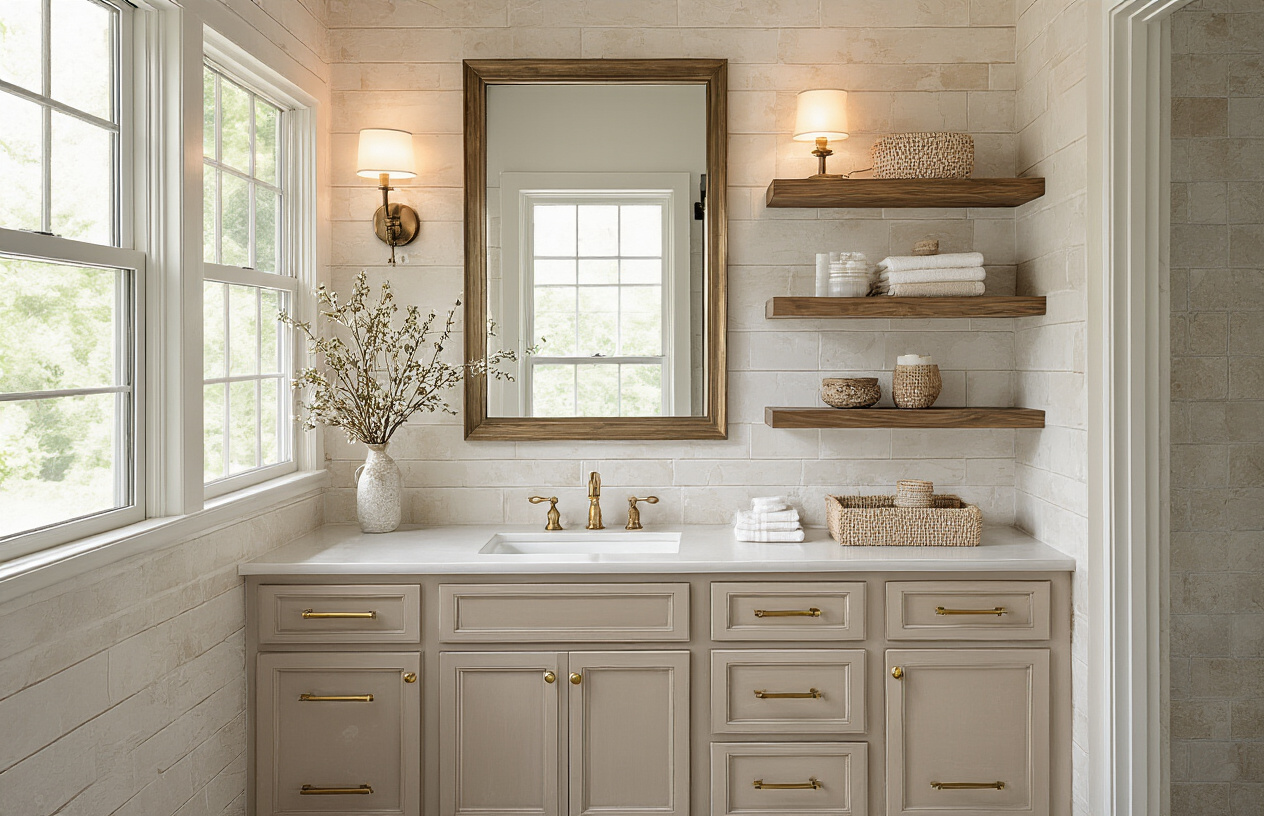
A. Hardware swaps that transform cabinets
Those boring cabinet pulls are killing your vibe. Spend $50 on new hardware and watch your kitchen or bathroom transform before your eyes. Seriously, it’s that simple.
Brass, matte black, or brushed gold hardware can instantly modernize even the most dated cabinets. No need for expensive renovations when this quick fix delivers such dramatic results.
For the biggest impact:
- Match your new hardware to existing fixtures
- Choose elongated pulls for a contemporary look
- Install leather pulls for unexpected texture
- Mix metals strategically (don’t go overboard)
I recently replaced my standard builder-grade knobs with sleek brass bars, and my neighbor thought I’d installed new cabinets. That’s the magic of good hardware.
B. Peel-and-stick solutions for backsplashes and floors
Peel-and-stick tiles have come a long way. The cheap-looking options of yesteryear? Gone. Today’s versions mimic marble, subway tile, and even encaustic patterns so convincingly your guests will never know.
For backsplashes, try marble-look stick-on panels behind your sink or stove. They’re heat-resistant, wipe clean easily, and install in an afternoon.
Floor tiles work best in smaller spaces like powder rooms. The key is proper prep:
- Clean thoroughly with degreaser
- Let dry completely
- Start from the center
- Use a credit card to smooth bubbles
A friend’s rental bathroom went from dingy to designer with $35 worth of hexagon peel-and-stick floor tiles. Two years later? Still looking perfect.
C. Fixture updates that make a difference
Swap out those builder-grade faucets and showerheads. Nothing screams “budget bathroom” like chrome fixtures from 2005.
You’d be shocked how affordable nice-looking fixtures have become. Big box stores sell matte black shower sets for under $100 that look identical to designer versions costing five times more.
Priority upgrades:
- Kitchen faucet (go for a pull-down sprayer)
- Bathroom sink faucet
- Showerhead and handle
- Toilet handle (yes, even this matters)
Don’t forget lighting fixtures! That dated vanity light bar? Replace it with wall sconces on either side of your mirror for instant spa vibes.
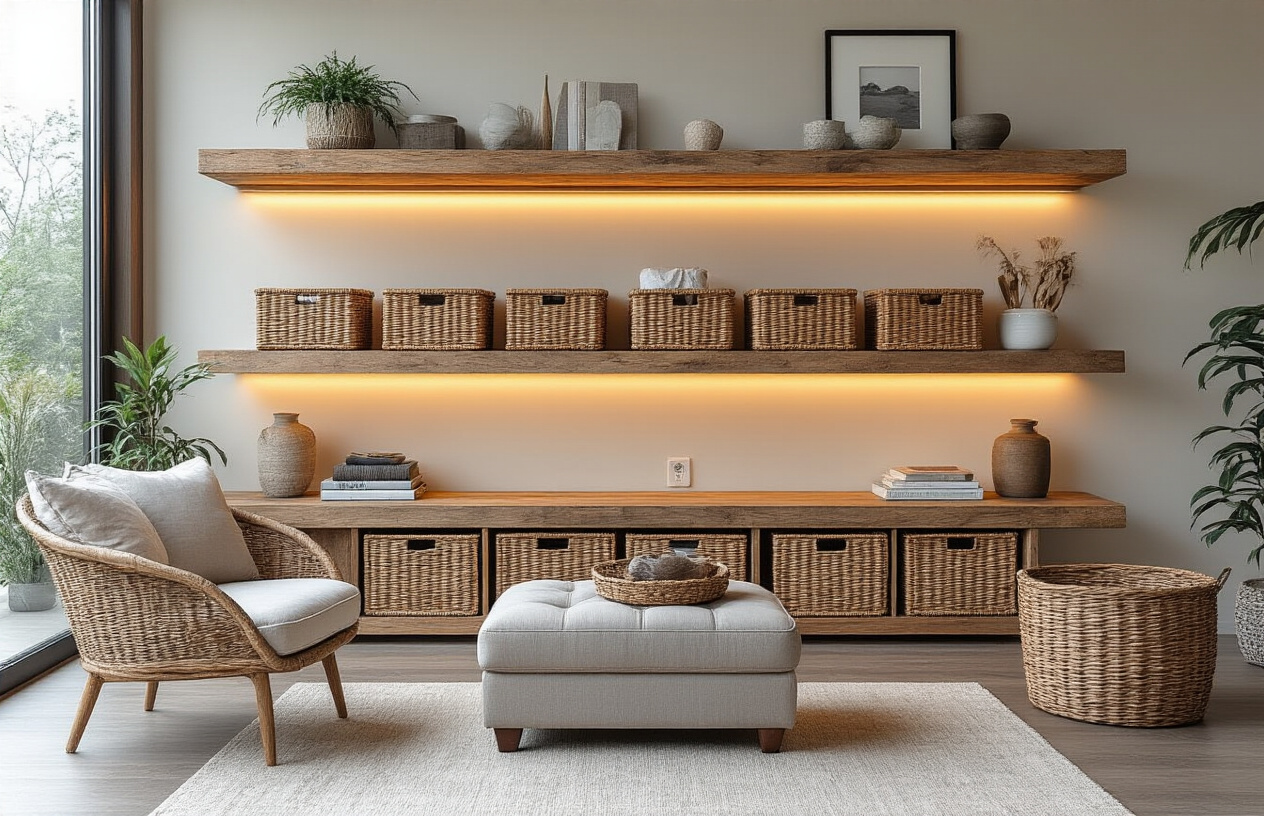
D. Organization solutions that create a custom look
Custom organization systems cost thousands. DIY alternatives? A fraction of that.
In bathrooms, floating shelves above the toilet instantly create storage and display space. Add glass canisters for cotton balls and Q-tips – suddenly you’re living that luxury hotel life.
For kitchens:
- Install tension rods under sinks to hang cleaning sprays
- Add drawer dividers for utensils and gadgets
- Use acrylic risers to maximize cabinet space
- Install pull-out baskets in deep cabinets
The secret to making organization look expensive? Consistency. Choose one basket style, one container type. That mismatched storage chaos is what makes spaces look cluttered and cheap.
E. DIY concrete and epoxy countertop techniques
Granite countertops cost a fortune. Concrete or epoxy? Fraction of the price with similar wow-factor.
For concrete counters, you don’t demolish anything – you pour a thin layer right over existing surfaces. Kits run about $200 compared to thousands for stone.
Epoxy counters deliver that glossy, marbled look that’s everywhere on Instagram. The technique takes practice but delivers stunning results:
- Sand existing counters
- Apply white basecoat
- Swirl metallic epoxy powders
- Pour clear topcoat
The process is messy but manageable for a weekend warrior. My sister transformed her laminate counters with a gray concrete overlay, and the compliments haven’t stopped since.
Styling Secrets of Interior Designers
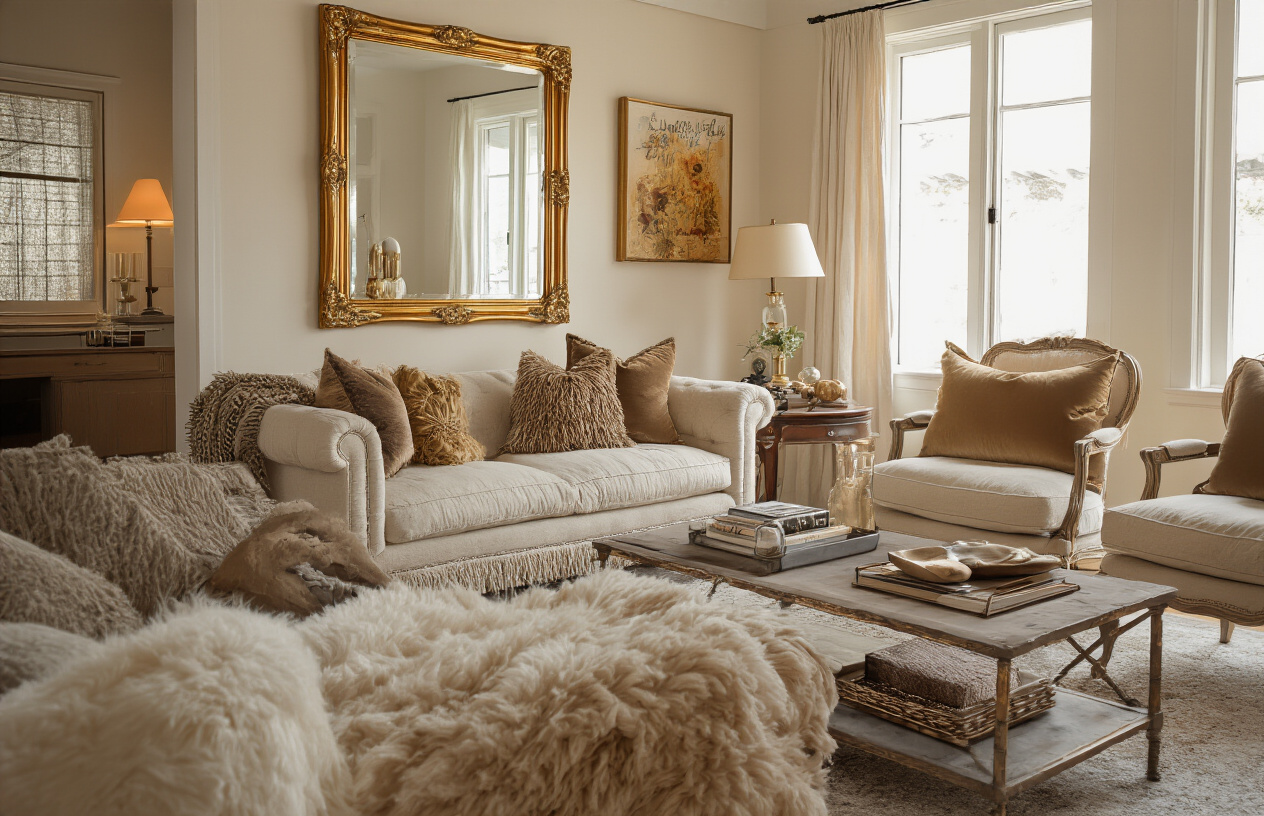
The rule of three for accessorizing
Ever noticed how the most gorgeous homes have decorative items arranged in threes? That’s no accident. Interior designers swear by the “rule of three” because odd numbers create visual interest that even numbers just can’t match.
Try grouping three candles of varying heights, or a small plant with a photo frame and decorative box. The magic happens when you mix different heights, textures, and sizes while maintaining a cohesive color story.
Want the designer secret? Create triangular arrangements rather than straight lines. Your eye naturally moves through the grouping instead of stopping abruptly.
Creating vignettes that tell a story
Those picture-perfect moments on shelves and tables? They’re called vignettes, and they transform random stuff into meaningful displays.
Start with something tall as an anchor, add a medium-sized item, then finish with something small and interesting. Each vignette should share something about you – maybe travel souvenirs paired with books you love.
The trick is connection. Every piece should relate to others through color, material, or theme. When guests ask about that quirky ceramic bird next to your grandfather’s watch, you’ve nailed it.
Decluttering strategies for a high-end look
Luxury spaces never look crowded. Period. The difference between “cozy” and “cluttered” is purposeful editing.
Try the 80/20 rule – leave 20% of your shelves, tables and counters completely empty. That breathing room is what makes expensive homes feel expensive.
Rotate your accessories seasonally instead of displaying everything at once. Store off-season items in labeled boxes and swap them out every few months. You’ll fall in love with forgotten treasures all over again.
When in doubt, group similar items together rather than scattering them throughout your home. Collections make more impact when displayed as a deliberate statement rather than random stuff.
Window Treatment Hacks
No-sew curtain solutions
Who says you need fancy sewing skills to have gorgeous window treatments? I’ve transformed countless windows without threading a single needle.
Grab some fabric hem tape and an iron—boom, instant hem! Just fold your fabric edge, place the tape inside, and press with a hot iron. Five minutes later? Custom-length curtains.
Or try my favorite hack: curtain clips! Buy any beautiful fabric (even bedsheets or tablecloths work), attach clip rings along the top edge, and hang them on your rod. Done and done.
Those shower curtain tension rods? Pure magic for small windows. Pop one inside your window frame, drape fabric over it, and secure with decorative clips.
DIY window films for privacy and style
Remember those boring frosted films from the hardware store? Forget them. Fill a spray bottle with water, a drop of dish soap, and a tablespoon of cornstarch. Spray on clean windows, apply simple contact paper, and smooth out bubbles. The result looks surprisingly high-end.
For a stained glass effect without the thousand-dollar price tag, grab some transparent colored contact papers and create geometric patterns. The afternoon sun will cast gorgeous colored shadows throughout your room.
Budget-friendly blinds and shade alternatives
Bamboo placemats make shockingly chic Roman shades. Just attach a few ribbon strips to the back with fabric glue and tie them up when you want light.
Old roller shades looking sad? Cover them with pretty fabric using spray adhesive. Nobody will know they’re the same blinds from 2005.
Those paper accordion shades from IKEA? About $6 each, but they look sleek and minimal—perfect for a Scandinavian vibe.
Smart Storage Solutions
Hidden storage ideas that reduce clutter
Who doesn’t want a home that looks like it belongs in a magazine? The secret that most design professionals won’t tell you: hidden storage is the real MVP of luxurious spaces.
Think about those stunning minimalist rooms you drool over on Pinterest. They’re not clutter-free because the owners own nothing—they just know how to hide everything!
Start with your coffee table. Swap that solid piece for one with drawers or a lift-top design. Now your remotes, magazines, and that embarrassing collection of take-out menus can disappear in seconds when guests arrive.
Hollow ottomans are another game-changer. They look expensive (especially in velvet or leather), provide extra seating, and swallow up blankets, toys, or seasonal items that would otherwise create visual chaos.
Don’t overlook your walls! Those dead spaces between wall studs? They’re begging to become recessed shelving. A simple DIY project with some drywall cutting can create elegant niches for books, toiletries, or spices, depending on the room.
Repurposing furniture for organization
That old dresser you’re thinking of ditching? Hold up. With some paint and new hardware, it becomes luxury entryway storage. The drawers are perfect for gloves, scarves, and all those items that normally pile up on the first flat surface inside your door.
Kitchen bursting at the seams? An unused bookshelf painted in a bold color transforms into a stunning pantry storage solution. Add some decorative baskets (dollar store finds spray-painted gold look surprisingly upscale) to hide packages and create that uniform look of expensive custom systems.
Nightstands with charging stations cost a fortune in design stores. But here’s the hack: any table can become one. Just drill a discreet hole in the back, add a grommet (under $5 at hardware stores), and suddenly your phone cords aren’t cluttering your sleep space.
DIY built-in look for fraction of the cost
Built-ins scream luxury but typically come with contractor prices that make your wallet weep. The secret? IKEA Billy bookcases. These humble shelves can transform into impressive built-ins with a few smart tweaks.
First, secure multiple units side by side. Then add crown molding at the top and baseboards at the bottom to connect them visually to your ceiling and floors. This simple addition makes them look like custom carpentry rather than budget furniture.
For the truly ambitious, add cabinet doors to the bottom shelves. This creates the high-end look of lower cabinets with open shelving above—a designer favorite that typically costs thousands.
The window seat trick works magic too. Place storage cubes or short bookcases under a window, top with cushions, and suddenly you’ve got a reading nook with hidden storage that looks straight out of a design magazine.
Small Details with Big Impact
A. Upgrading switch plates and outlet covers
Ever walked into a fancy home and couldn’t figure out why it felt so polished? It’s those tiny details you barely notice. Plain white plastic switch plates scream “builder-grade” while custom ones whisper “custom home.”
Swap those boring covers for brushed nickel, oil-rubbed bronze, or decorative designs that match your aesthetic. The best part? Most cost between $5-15 each. Focus on high-visibility areas first—living room, entryway, kitchen—where guests will notice.
Pro tip: Don’t forget those unsightly thermostat covers. They’re massive eyesores that can be transformed with paintable versions that disappear into your wall.
B. Door and cabinet hardware replacements
Cabinet pulls and doorknobs are the jewelry of your home. And just like adding a statement necklace to a basic outfit, swapping out boring hardware instantly elevates your space.
Matte black handles on white cabinets? Stunning. Brass knobs on navy doors? Chef’s kiss.
Check places like Amazon, Wayfair, or even IKEA for budget options that look high-end. For the biggest bang for your buck, stick with trending finishes:
- Brushed brass
- Matte black
- Champagne bronze
- Satin nickel
Bonus hack: Spray paint existing hardware if replacement isn’t in the budget. Just make sure to prep properly with primer designed for metal surfaces.
C. Crown molding and trim on a budget
Crown molding is that finishing touch that makes rooms feel complete. But traditional wood molding can break the bank.
Instead, try:
- Polyurethane foam molding (lightweight, pre-primed, and super affordable)
- Peel-and-stick crown molding (yes, it exists!)
- Picture frame molding on walls (creates instant architectural interest)
The secret to making cheap molding look expensive? Perfect painting. Use quality paint in a semi-gloss finish for that authentic look. Caulk every gap before painting for that seamless luxury finish.
D. Plants and greenery for luxury ambiance
Nothing says “I have my life together” like thriving houseplants. High-end homes always feature strategic greenery.
Can’t keep plants alive? No problem. Today’s faux options are incredibly realistic. Place large statement plants in empty corners and smaller ones on shelves and counters.
For real plants, these varieties look expensive but are nearly impossible to kill:
- Snake plants
- ZZ plants
- Pothos
- Rubber plants
The planter matters as much as the plant itself. Ditch plastic nursery pots for ceramic, concrete, or woven baskets. Thrift stores are goldmines for unique vessels that cost a fraction of retail prices.
The ultimate luxury hack? Layer plants at varying heights in one area rather than spreading them thinly throughout your home. This creates a lush, intentional look that feels like it was professionally designed.

Creating a beautiful, luxurious home doesn’t require breaking the bank. With strategic paint choices, thrifted finds, and clever lighting, you can dramatically transform your space. Textiles, mirrors, and art placement work together to create the illusion of grandeur, while simple upgrades to bathrooms and kitchens can refresh these spaces without renovation costs. The styling techniques used by professionals—from thoughtful window treatments to smart storage solutions—are accessible to everyone with a bit of creativity.
Remember that luxury often lies in the details. Small touches like updated hardware, carefully curated accessories, and organized spaces make the difference between a house and a home that feels truly special. By implementing these budget-friendly design hacks, you can create a space that not only looks expensive but feels personal and welcoming. Start with one area at a time, and watch as your home transforms into the luxurious retreat you’ve always wanted—all while keeping your wallet happy.